This quick and easy blackcurrant jelly explodes with delicious fruity flavour.
Made with just 2 ingredients it is an easy jelly and has no added pectin. It is a great alternative to jam especially for those who prefer a seedless jam. Try it spread on bread, toast or scones.

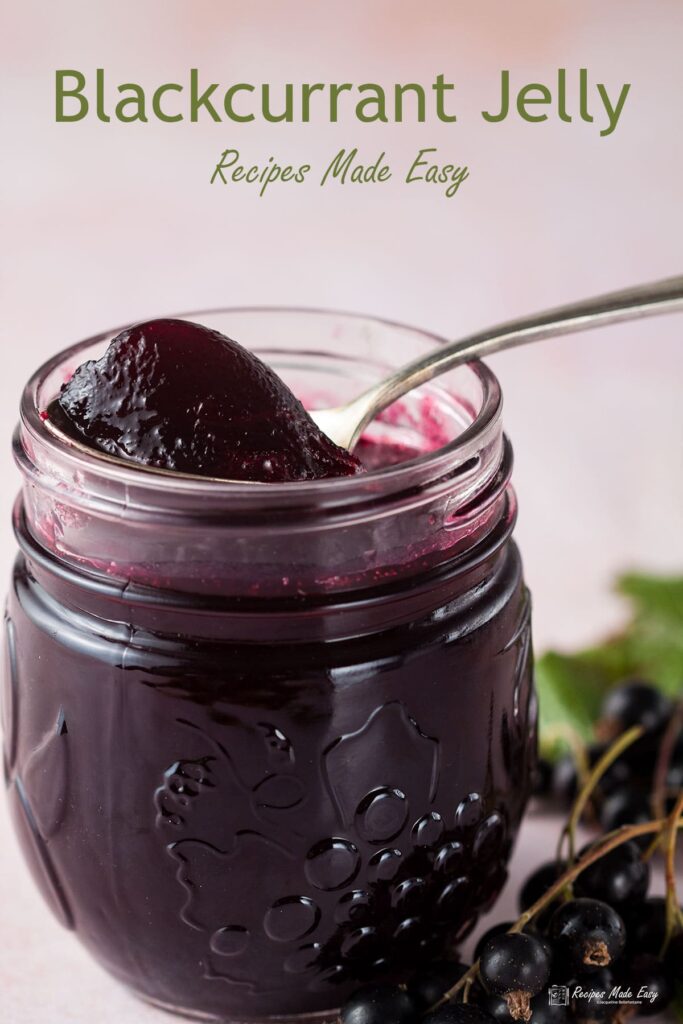
Ask my boys what their favourite jam is and it will be strawberry jam but blackcurrant jam has always been my favourite. I am just as partial to blackcurrant jelly which is basically a seedless variation of the jam.
Bursting with flavour I love it! So when I discovered a new quicker and even easier way to make it I cant; tell you how happy that made me.
Just 2 ingredients
To make blackcurrant jelly you just need two ingredients (not including water) blackcurrants and granulated sugar.
I generally like to use golden granulated sugar (which is less refined than white sugar) but white granulated sugar can also be used. Basically whichever you have in your cupboard.
Blackcurrants are rich in pectin so you do not have to use special jam sugars or add pectin when making this preserve.
Quick and Easy
One of the joys of making blackcurrant jelly as opposed to jam is there is not any need to strip them from the stems. They can go in with the blackcurrants as they will be strained out later. simply rinse the fruit and shake dry then place them in a preserving pan or very large saucepan.
The fruit is then cooked before straining the juice.
Cook's Tip
Preserving pans have sloped sides which makes bring the preserve to a rolling boil easier. They are worth buying if you make a lot of preserves.
If you are using a saucepan remember the jam will rise high up the sides when it boils so should not be filled more than ⅓ to ½ full.
No jelly bag or long straining required
While making most fruit jellies is straightforward, they are not always quick. First, the fruit is cooked and then juice needs to be strained from the fruit pulp. Usually by straining through a jelly bag which can take several hours.
Until a few years back I used to make my blackcurrant jelly the same way waiting patiently for the juice from the cooked fruit to drip through the jelly bag. Until a friend told me they just pushed the fruits through a fine sieve.
If you were to do this when making my apple jelly or redcurrant jelly you would end up with a cloudy rather than the desired clear jelly. But as my friend pointed out blackcurrant is such a dense dark colour it doesn't need to be completely clear.
So, I gave it a go, and she is quite right! Unless you hold the jar up to the light you cannot tell the difference and even then it's only just noticeable.
A bigger yield
Once you have tried it there's no going back to the old method. And this method has a big advantage. You get a much bigger yield from the same amount of fruit with no loss of flavour.
This time I had such a big crop of blackcurrants, I did a side by side comparison. For the traditional method, I got a yield of 750g (1 lb 10oz) and with this quick and easy method 1250g (2lb 12oz). That's almost double so it really is a win, win!
Boiling the jelly
After straining the fruit juice it is placed in a preserving pan or very large saucepan. The sugar is added heating gently until the sugar has dissolved.
Next, it is brought to a rolling boil and the jelly is boiled until the setting point is reached.
I use a thermometer when making jams and jellies, it is probably the most accurate and easiest way to check the jam has reached the setting point 104-105°C ( 219-221 °F).
If you do not have a thermometer boil for about 10 minutes, Then remove it from the heat and test for a set. Returning to the heat to boil a little longer if required.
How to test for a set
- Before you start making your jam or preserve, place a couple of plates in the fridge to chill.
- When you are ready to test for set, remove the pan from the heat. Drop a little of the preserve onto a chilled plate and return to the fridge for about 2 minutes. Gently push your finger into the mixture and see if it mounds and wrinkles. If so, the setting point has been reached.
- If not, return the mixture to the boil for few more minutes and retest. Repeat again as necessary until setting point is reached.
See my preserving tips for more jam making hints and tips.
Once setting point is reached
Use a straining spoon to remove any scum that has formed during boiling. Then pour into hot sterilised jars. Cover the surface with a wax jam disc and seal.
Allow to cool completely then label and store in a cool dark place.
How to sterilise jam jars
- Wash the jars in warm soapy water and rinse well. Do not dry.
- Place the wet jars on a tray, heat the oven to 140℃ (120℃ fan)/275°F /gas 1 and put the jars in the oven to dry completely.
- Sterilise the lids (and rubber rings if using Kilner style jars) in a pan of boiling water for 5 minutes.
I always sterilise one or two more jars than I think I will need, to ensure I have enough.
How to make blackcurrant jelly step by step
What to serve blackcurrant jelly with
Not only is it a delicious alternative to jam to spread on bread, as well as on scones, croissants, pancakes etc. It also makes a great filling for cakes.
It can also be used to make a glaze for dark fruits on flans and tarts, simply warm gently with a little water before brushing on.
And why not try it with some cheese and crackers. It goes very well with soft fresh cheeses.
How long will the jelly keep?
The blackcurrant jelly will keep for at least 1 year if stored in sealed jars in a cool dry place. Once opened store in the refrigerator.
Quick and easy blackcurrant jelly
Equipment
- preserving pan or very large saucepan
- fine sieve
Ingredients
- 1 kg (2¼ lb) blackcurrants
- 800 ml (1¼ pt) water
- about 750 g (1lb 10oz) golden granulated sugar 75g (3oz) of sugar for each 100 ml (3½ floz) of juice.
Instructions
- Wash 1 kg ( 2¼ lb) blackcurrants and place in a large saucepan or preserving pan and add 800ml (1¼ pt) water. There is no need to strip the blackcurrants from the stems. Bring to the boil then reduce the heat and simmer gently for 30 minutes.
- Place a couple of saucers into the fridge.
- Strain the blackcurrants through a fine sieve and press down well with the back of a spoon to remove as much juice as possible. Discard the fruit pulp.
- Measure the juice obtained and return to the preserving pan. Add 75g (3oz) of sugar for each 100 ml (3½ floz) of juice.
- Heat gently stirring until the sugar dissolves, then increase the heat and bring to a rolling boil. Boil for 10 to 12 minutes or until the temperature reaches 104-105°C ( 219-221 °F).
- Remove from the heat and test for a set. A small amount dropped onto the cold saucers and left for a minute or two should wrinkle when pushed with your finger tip.
- Return to the heat and boil for another 1 or 2 minutes if required before testing again.
- Pour the jelly into sterlised jars, seal and label.
Gretha Lindwood says
Yummy and so easy to make! Have been wanting to do something interesting with our blackcurrants. Bonus - I didn't have to take off the blossom end things first. I couldn't get the wrinkle test to work for me even after cooking the juice longer but it seemed to be jelling around the edge of the pan so we tested the temperature and it was hotter than the recipe called for. I ladled it into jars anyway and it's perfect! I spooned a bit over vanilla ice cream but the two together was much too sweet but it's great with a cracker or pita chip, a little chèvre, and a dollop of blackcurrant jelly. Thanks for the recipe!
Jacqueline Bellefontaine says
Im pleased you like it. I make it every year once I discovered there was no need to wait for it to drip through slowly. Wish I though of that years ago!
Antoinette Botsford says
You do not process this in a boiling water situation once they are in the jars?
Jacqueline Bellefontaine says
No I do not. In the US and some other countries, it is common to use a water bath after potting, while this is necessary with some preserves especially low sugar or low acidity preserves, it is not common practice in the UK. This recipe follows the UK style of preservation which relies on acidity/ sugar concentration to prevent spoilage and is a method of preservation that has been used for centuries.
Julie Kelshaw says
I know I posted last year, but I'm here again to say "thank you" again for this great, easy recipe. 400g this year from my one small bush, but still thrilled with my two medium jars. I love jam & cheese on crackers (it's a Lancashire, UK, thing!) and this is just perfect with cheese. To avoid any seeds in my jelly I forced it through my jelly bag instead of a seive - super smooth jelly. It did splash a bit - kitchen sink looked like I'd been on a killing spree! Again, many thanks for your great recipes.
Bridget King says
I have a glut of blackcurrants, which I have been freezing as I go. Made this last night with a kilo of blackcurrants freshly picked - followed the recipe and instructions exactly (I used a jam thermometer, and also inherited my late mum's preserving pan, so used that too) I thought I may have 4 jars of ribena when I went to bed - but this morning, I have 4 beautiful jars of blackcurrant jelly - you are right, it's such a deep colour, it looks completely clear! Tried it out on pancakes this morning - just delicious! At least I know what I'm going to with the rest of the blackcurrants currently residing in the freezer! Such a quick and easy recipe - thank you!
Jacqueline Bellefontaine says
Ahh yes now Ive made it this way I wouldnt go back to the carefully straining again. Enjoy your stock from the freezer it so great spreading out the delicious flavour of blackcurrants over time.
Julie Kelshaw says
Many thanks for this super simple recipe. I have a very small blackcurrent bush rescued from a neighbours garden re-vamp, and only had 100g of fruit. So I did the maths to reduce water & sugar qtys and in no time at all I had myself two little jars of delicious jelly! They'll be eaten up in no time at all!
Jacqueline Bellefontaine says
Thats fabulous. What a great thing to rescue and hopefully you can look forward to bigger and bigger crops in years to come.
David Morgan says
I made the gooseberry jam on Wed all went well and set lovely My Grand children liked it, Then on yesterday made blackcurrant jelly all fruit from my allotment,first batch done to recipe all went great ,then done another batch and I went wrong I boiled the fruit transferred it to the big saucepan then boiled it with the sugar ,then realised I was supposed to squeeze the fruit out first , I have 5 jars of runny liquid ,memory problems can be a nuisance, Any ideas how I can use it ,going to pick more blackcurrant and goosberies on weekend , I lovely tasting recipe ,will not be put off, Thank you so much
Jacqueline Bellefontaine says
Its so frustrating when you make silly mistakes isnt but we all do from time to time. If you added the correct amount of sugar to the amount of juice and fruit you should be able to boil to set and have blackcurrant Jam! Alternatively you could use it as a syrup to pour over ice cream or strain out the pieces and use the syrup as blackcurrant cordial by diluting with water.
Aisha Knight says
I had larger quantities so did the maths and kept my fingers crossed. Whilst my rolling boil hit 105°c after 10 minutes, the test sets kept refusing to wrinkle. After another 15 nerve-wracking minutes of swapping out saucers I detected a wrinkle and by the time I'd loaded the final jar it was positively gelatinous! Otherwise a very simple recipe to follow and looking forward to trying it.
Jacqueline Bellefontaine says
For some reason, testing for a set is always a bit more hit-and-miss with larger quantities. Glad you found the recipe simple and hope you really enjoy the fruits of your labour
Linda Carroll says
Can you use frozen berries without thawing first?
Jacqueline Bellefontaine says
yes you can
Annette Graham says
Made this to-day and found it a much easier and quicker way than putting the fruit in muslin and allow to drip overnight. I had 3 pints of juice after sieving and used 3 lbs sugar, it took a little longer than 10 mins., to set as I had to be careful when boiling as I do not have a preserving pan, thank you I shall always use this method for jellies in future.
Jacqueline Bellefontaine says
Glad you found it easy. Its the prefect method to use if you dont need an absolutely clear jelly I too use it all the time now.
Sandra says
I don't have enough black currants. Is it possible to mix in some red currants as well?
Jacqueline Bellefontaine says
Yes you could make this with a mixture of the two although the blackcurrants will likely be the dominant flavour. I would love to hear what the final flavour is like so do let me know if you give it a try.
Roisin McCullagh says
Yesterday I had 1.5kg blackcurrants so I added 1.2l water, brought it to the boil, simmered for 30 mins. I had 550ml juice, added 420mg sugar, brought it back to boil for 10-12 mins, but the thermometer never went above 100-101°C, the sample on the chilled saucer remained liquid after 5 mins, so I reboiled and simmered for another few minutes, once again the sample remained liquid. I added another tablespoon of sugar, stirred it in while bringing it back to the boil. Decided to pop the lid on for a minute, it bubbled up very quickly and spilled over the top, the temperature shot up to 106°C, so I quickly decanted it into the sterilised jars. I had cut out labels from parchment paper, but with the heat couldn't get them to unfurl, so just sealed the jars with the lids instead. I checked them today to see if they had set, but all I have is five jars of Ribena. Feeling miz
Jacqueline Bellefontaine says
I have checked your proportions and they are correct how ever the fact that you have increased the quantities will effectthe recipe especially when it comes to timing. The most like cause of the problem is insufficient boiling. Firstly you will have a smaller surface area to volume so this will slow down evaporation. Also unless you have an extremely large pan it will be very difficult to get a good rolling boil. The fact that when you covered it boiled over suggests you might not have it boiling fast enough. and if you cover then again it can not evaporate until you have the correct set. I know that you said that it shot up to 106 but you may not have taken a true reading perhaps you got the steam or the base of the pan. One other possibility could be if the blackcurrants were over or under ripe they might not have had enough pectin. You could try re boiling and perhaps add some lemon juice if the pectin levels may be off.
I'm sorry you are having a problem I have made this recipe many times and had no problem getting a set. I would recommend in future that you do not increase the quantity from that stated in this tried and tested recipe as even when you keep the proportions correct this can affect how the recipe turns out especially when making preserves.
Róisín says
I should have harvested them about a week before I did as there were some over ripe ones. Also thought maybe I didn’t squeeze enough out of the pulp (the sieve had a weak handle). When they were boiling, they never seemed to reach a ‘rolling’ boil and the temperature didn’t want to budge above the 100-101 mark. Will try re boiling my ribena with lemon juice. Many thanks for your help.
Jacqueline Bellefontaine says
I hope that does the trick.Good luck
Ellie says
Just the recipe I was looking for but...I have a problem... I only have 1 3/4 cup of black currants and I don't know how to measure the amounts of water and sugar since I have so little. I would like to make some jelly just to see.
P.S. I only have 2 small black currant bushes. I like them since I was a child but thy are difficult to grow where I live (very cold, short Summers, and lots of rain of late).
Any insight would be very much appreciated.
Thank you for a lovely presentation and your time
Jacqueline Bellefontaine says
With the amount of blackcurrants you have I think you would need approx 1 cup water and 2¼ cups of sugar. I would cook the blackcurrants for the same amount of time but the boiling time once you have added the sugar may be shorter. You can also make blackcurrant jelly with frozen blackcurrants so if you can get any frozen currants you could make the full amount. Hope that helps.
Ellie says
Thank you so much for reply. I ended up using no sugar needed pectin because I couldn't find it where I saved your website until today 🙂
Rae says
Smells and tastes lovely but didn’t set.
Jacqueline Bellefontaine says
Hi Rae, If it hasn't set then you have not boiled the jelly suffiecinetly to reach the setting point. You can return the jelly to the pan and reboil for a few minutes and retest for the set. See the tips in the body of the post on how to test for the set.
Ash says
How long does it take to set in fridge or out of fridge please
Jacqueline Bellefontaine says
So long as the jelly is boiled to setting point (see details for temperature or how to test for set in the body of the post) the jelly/jam does not need to go into the refrigerator. You just need the jelly to cool completely for the set.
Chloe says
I'm still deciding what to do with my very small amount of homegrown blackcurrants but this is looking like a real contender!
Jacqueline Bellefontaine says
IT would be a good choice.
Marita says
This Jelly looks delicious. I am going to try and make it, as the black currents are just about ripe here. x
Jacqueline Bellefontaine says
It really is so im sure you will love it.
Janice says
I've never tried making blackcurrant jelly before but it looks absolutely delicious. Thanks for the detailed instructions and helpful tips.
Jacqueline Bellefontaine says
It is delicious and very easy to make.
Jo Keohane says
I love anything made from Blackcurrants and this jelly looks delicious. I will definitely be trying this over the summer, thanks for posting!
Jacqueline Bellefontaine says
Im sure you will love it its a great way of using blackcurrants