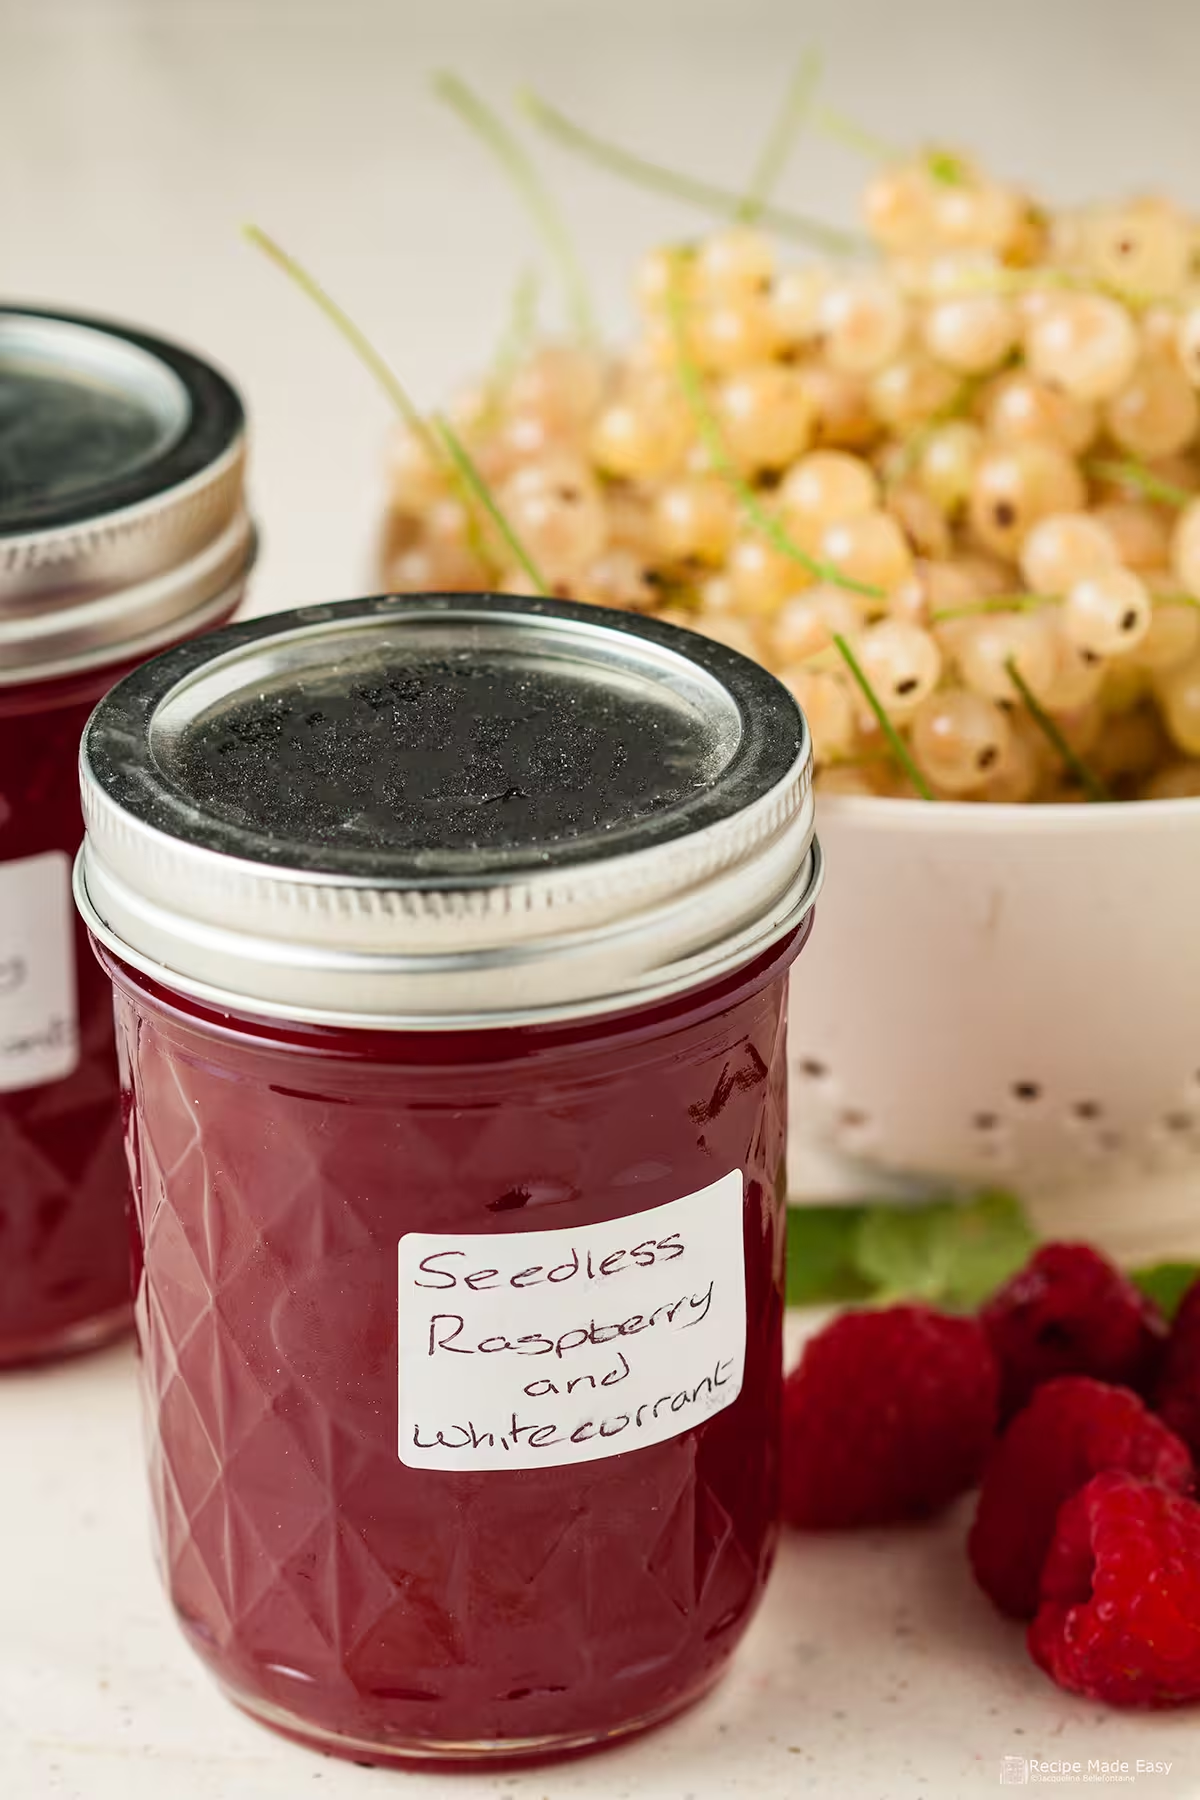
This seedless raspberry and whitecurrant jam blends the rich sweetness of raspberries with the delicate, floral tang of whitecurrants for a smooth, vibrant spread—no seeds, no fuss.
Follow the easy step by step recipe and you’ll end up with a silky jam that’s as good on toast as it is in desserts or cakes.
Why Choose Seedless Raspberry and Whitecurrant Jam?
Great Flavour
Sweeter than red currants, White currants have a soft tartness with some floral notes, which complements many of the sweeter fruits and adds another depth of flavour to this delicious raspberry jam.
Ease of making
Raspberries are low in pectin which is essential for setting a jam but white currants are high in pectin making them a great choice for using in jams and jellies. The combination of the two berries here not only gives a unique flavour profile but it also makes it a super easy jam to make, as it sets well.
Cook's Notes
The pectin content is higher when the fruit is underripe, so if you grow your own you could consider picking some before full ripeness for the purpose of jam making.
Smooth texture and good yield
While I am not adverse to bits in my jam and will happily tuck into whole raspberry or even blackcurrant jam, white currants are a bit too full of seeds even for my liking, so when using white currants in jam I will always recommend making it a seedless jam.
The younger members of the family also prefer seedless jam, so sometimes it can be a simply matter of taste that make the decision of whether to go for seedless jam or not.
Don’t confuse seedless or smooth jam with jelly—while both are made in a similar way, jelly (like this redcurrant one ) uses only the fruit juice. Seedless jam recipes, on the other hand, use pureed whole fruit with the seeds strained out. This results in a fuller texture and flavour.
It also gives a higher yield than a jelly and is much quicker to make as you do not need to wait for the juice the fruit, which can take time and patience if you want a clear jelly.
How to use seedless raspberry and whitecurrant jam
Of course it is great as a spread for bread and toast at anytime. For a real treat try spread on scones with or without cream, croissants or crumpets. Or try one of these :
- It can be gently warmed and used a a glaze on fruit tarts such as my strawberry or raspberry tarts
- As a glaze on danish pastries
- Seedless jams are ideal as a filling for doughnuts
- Perfect in a Victoiria sandwich or as a filling in celebration cake
- As a filling for macarons for a burst of fruity flavour.
- I like to serve this jam with cheddar or manchego cheese
- Or as an alternative to redcurrant jelly with roast chicken
- And no doubt it would be great with peanut butter in a sandwich.

Ingredients
With just four ingredients and no need for special sugar or added pectin, this easy step-by-step recipe is perfect for beginners and seasoned jam makers alike.
See recipe card for full instructions and quantities.
- Raspberries
- White currants
- Granulated sugar – I like to use white cane granulated sugar for this recipe but any granulated sugar is ok
- Lemon juice – add a little acidity especially if the white currants are fully ripe and helps the set
Equipment
- A jam thermometer (optional). If you're using a thermometer, you can rely on the jam reaching the correct temperature and skip the cold plate wrinkle test. Though personally, I like to play it safe and use both methods just to be sure.
- A jam funnel will also making potting easier but a jug will suffice.
- Preserving pan or very large saucepan about 6.5 litres (about 14 pints)- You can use a smaller pan to cook the fruit but when it comes to the boiling step, the jam will rise high up the sides of the pan and you do not want a hot sticky mess all over your cooker top!
- Wooden spoon – choose one with a long handle
- Fine mesh sieve or food mill
- Sterilized jars for storage
How to sterilise jars
There are several effective ways to sterilise your jam jars:
- Run jars and lids through a hot dishwasher cycle.
- Sterilise them in the oven on a tray. (See below for details)
- Microwave the jars (with a little water inside) and boil the lids separately.
- Boil both jars and lids in a large pot of water.
Whichever method you choose, the key is to let everything air dry without touching the inside surfaces. Even the slightest contact can compromise sterilisation. I mostly use the second method unless I have a full wash to do in the dishwasher at the same time.
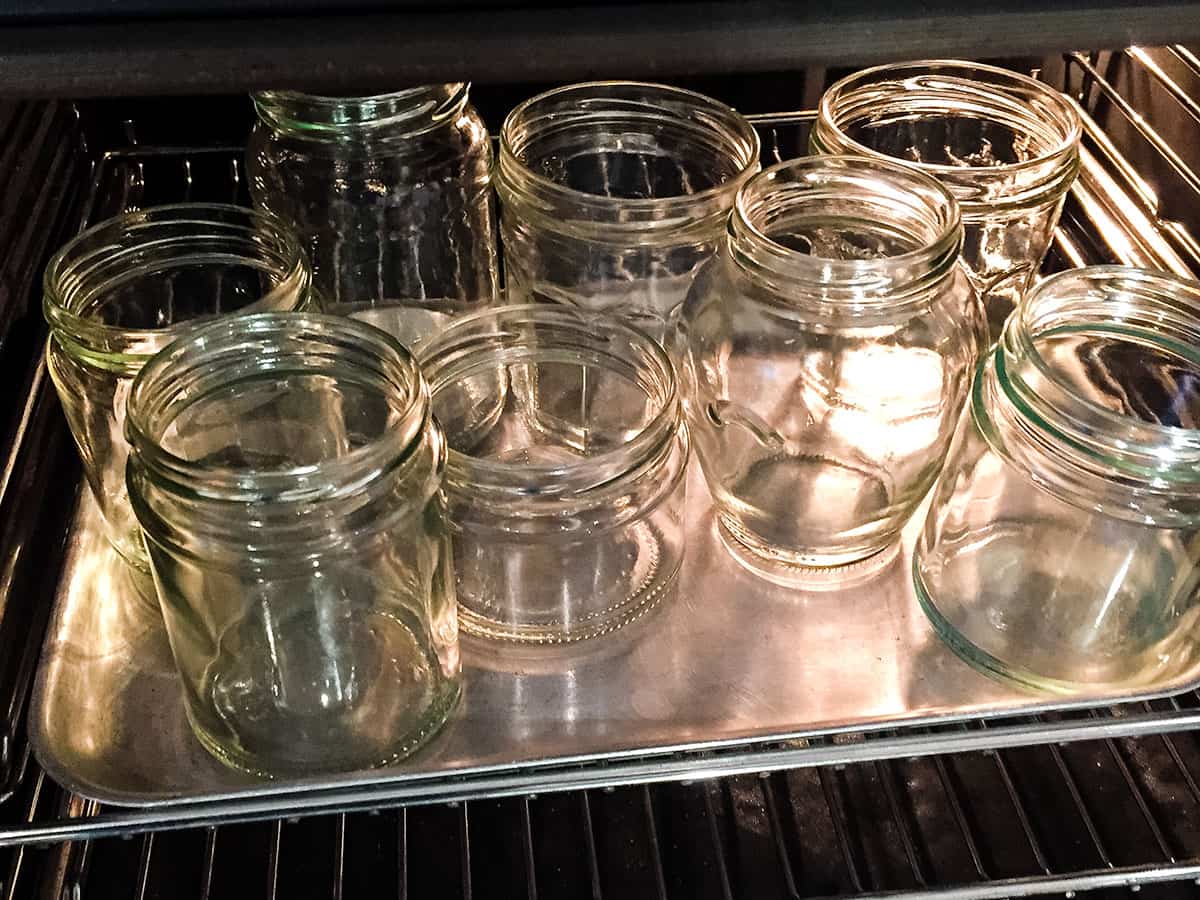
To sterilise in the oven
- Wash the jars in warm soapy water and rinse well. Do not dry.
- Place the wet jars on a tray, heat the oven to 140℃ (120℃ fan)/275°F /gas 1 and put the jars in the oven to dry completely.
- Sterilise the lids (and rubber rings if using Kilner style jars) in a pan of boiling water for 5 minutes.
I always sterilise one or two more jars than I think I will need, to ensure I have enough.
How to make seedless raspberry and white currant jam step by step
Step 1
Wash and dry the fruit and place in pan.
Step 2
Add the sugar.
Step 3
Add lemon juice and water.
Step 4
Heat gently stirring until sugar is dissolved and fruit is very soft.
Step 5
Press through a sieve discarding the seeds.
Step 6
Bring to a rolling boil until setting point is reached. You can pot the jam immediately.
How to test for a set
- Before you start making your jam or preserve, place a couple of plates in the fridge to chill.
- When you are ready to test for set, remove the pan from the heat. Drop a little of the preserve onto a chilled plate and return to the fridge for about 2 minutes. Gently push your finger into the mixture and see if it mounds and wrinkles. If so, the setting point has been reached.
- If not, return the mixture to the boil for few more minutes and retest. Repeat again as necessary until setting point is reached.
See my preserving tips for more jam making hints and tips.
Potting and sealing the jam
- Skim off and discard any scum that has formed on the jam using a metal draining spoon. Fill the jars while they are still hot.
- Use a wide jam funnel to make filling easier.
- Fill almost to the rim to allow for shrinkage on cooling. Immediately after each jar is filled, cover the top with a waxed disc (wax side down) or piece of parchment so that it lies flat on the surface and excludes any air. This will help to prevent mould forming in storage.
- Then place the lid on the jar while the jam is still hot.
- Alternatively, the jars can be sealed with cellophane secured over the jar with a rubber band. As the preserve cools the cellophane will tighten producing an airtight seal.
Cooks Notes
Whatever you do, don’t touch the hot jam—no matter how tempting it looks. Even if its just a drip on the side that appears cooler, resist the urge. It’s extremely hot and can cause serious burns.
Take care when stirring jam when it is boiling as it can cause large bubbles to rise to the top and splatter.
Can I use frozen berries for this jam?
Yes, frozen raspberries and whitecurrants can be used. Which is handy if you grow your own as I do. I find when my harvest of berries is in full swing I don't always have time to make jam, so simply pop the fruit in the freezer to use later.
There is no need to defrost first just add frozen to the pan and carry on as per the recipe.
How long will the jam keep
If properly sealed and stored the jam will last at least 1 year (if you can resist eating it all that long!). Once opened store in the fridge and consume within 2 months
Seedless raspberry and whitecurrant jam
Equipment
- Preserving pan or very large saucepan about 6.5 litres
- wooden spoon
- Fine mesh sieve or food mill
- Jam funnel (optional) and/or jug
- 4 x 350g Sterilized jars
Ingredients
- 500 g (1lb 2oz) Raspberries fresh or frozen
- 400 g (14oz) White currants fresh or frozen
- 750 g (1lb 10oz) Granulated sugar
- 1 lemon juice only
- 300 ml (½ pt) water
Instructions
- Place all the ingredients in a preserving pan or very large saucepan and heat gently stirring until the sugar dissolves. Bring to a gentle boil then reduce the heat and simmer gently for 2 to 3 minutes until the soft is very soft.
- Strain through a fine sieve or a food mill to remove the seeds, extracting as much fruit pulp as you can.
- Return to the rinsed out pan, discarding the seeds and bring to a rolling boil. Boil for 5 minutes, gently stirring every now and then until the mixture reaches 105 °C (221°F)
- Test for a set (see notes and body of post for more details).
- Pour into sterlised jars, seal and allow cool. Label and store in a cool dark place.
Notes
Nutrition
Did you make this recipe? I would love to know what you think, so please rate and leave a comment to let me know.
Do I need a water bath to make the Jam?
Pin for Later
In the US and some other countries, it is common to use a water bath after potting, while this is necessary with some preserves especially low sugar or low acidity preserves, it is not common practice in the UK. This recipe follows the UK style of preservation which relies on acidity/ sugar concentration to prevent spoilage and is a method of preservation that has been used for centuries.
Have you made this recipe? I would love to hear from you. Did you enjoy it, did you change anything? Leave a comment and rate the recipe. Comments may be held for moderation before publishing.